How to manually give access to your course on Selar
If you have a customer who made a payment outside of Selar and you wish to grant them access to their purchase on the Selar platform, follow these two simple steps:


Step 1: Grant Access via Email
Create a 100% Discount Coupon
- Generate a coupon that offers a 100% discount on the course.
Enter Customer Details on Your Store Page
- Input the customer’s email address and name on your store page.
- Apply the coupon to their purchase. This will trigger an email to be sent to the customer with a link to access the course.
- Note: After making the payment using the coupon, do not click the link on the receipt page. Just complete the payment process, and the customer will receive the access link via email.
Visit Your Products on Selar
- Go to: https://selar.co/me/products.
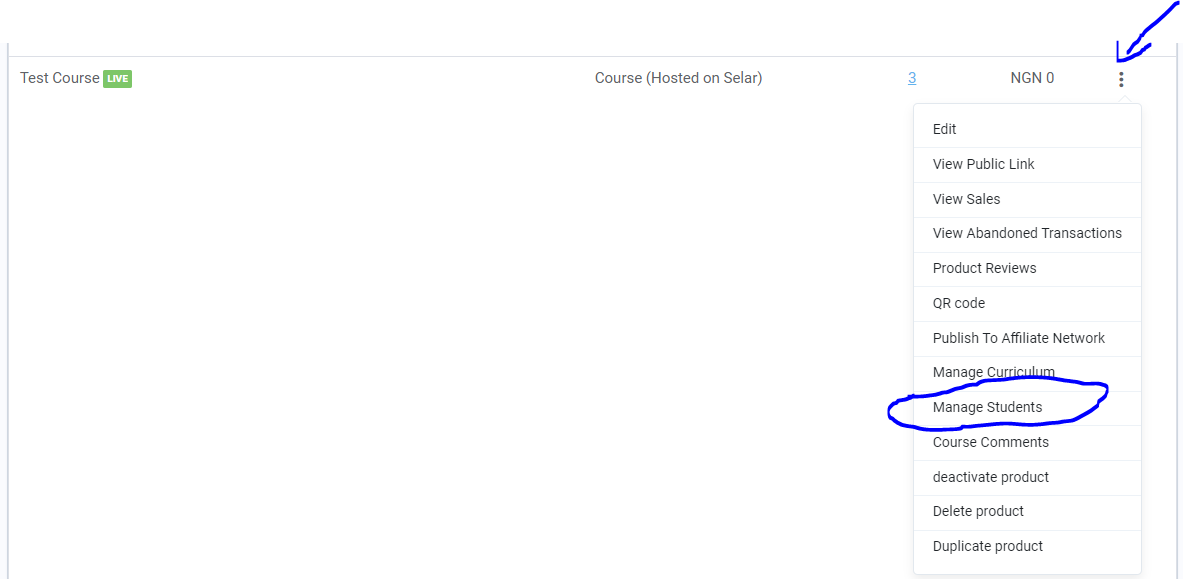
Select the Specific Product
- Identify the course you wish to grant access to.
- Click on the three dots next to the product details to manage students.
3. Choose the Method of Adding Students
- Decide whether to add students in bulk or individually.
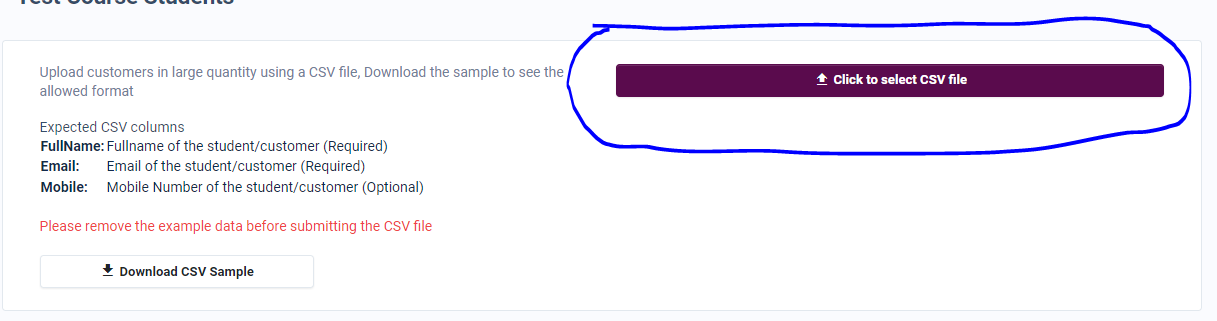
4. Download the Sample CSV File
- Download the provided sample CSV file.
- Follow the headers in the sample and enter the necessary student/customer details, including Full Name and Email. The mobile number is optional.
5. Upload the Completed CSV
- After filling in the CSV, click the Select CSV button to upload it.
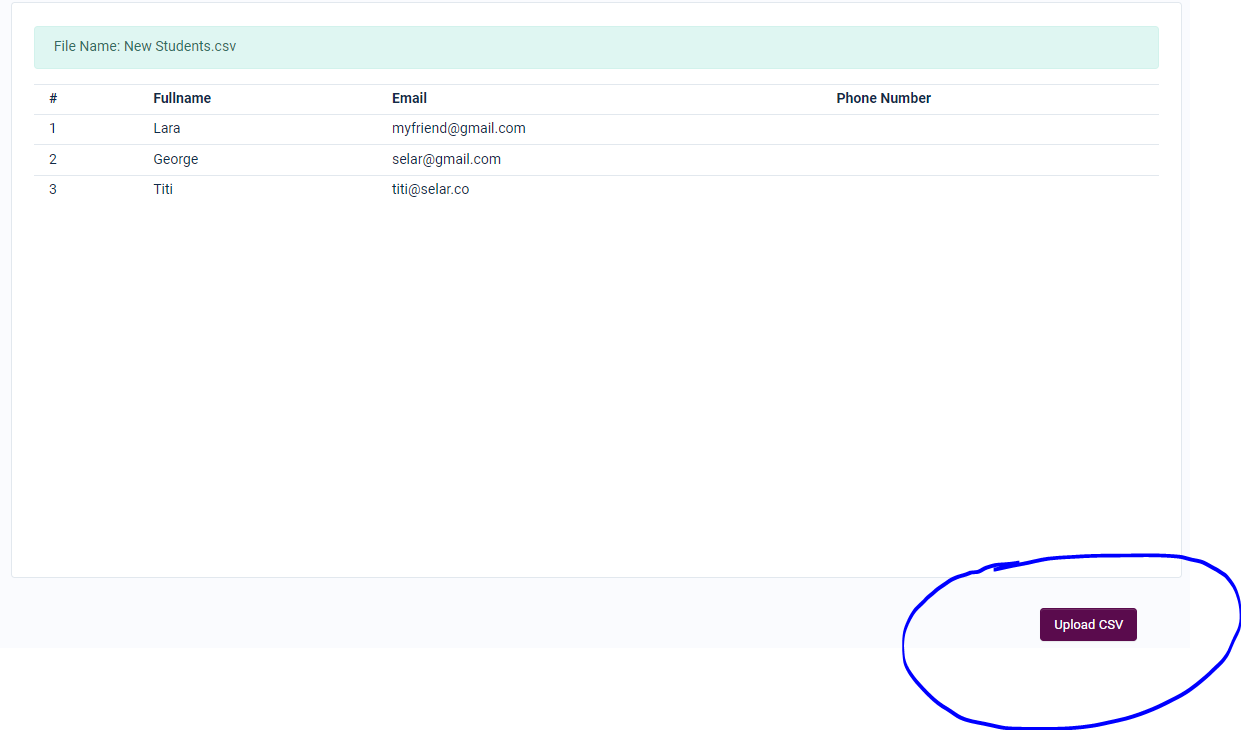
6. Wait for Student Details to Show
- After uploading, wait for the platform to display the uploaded students' information. The page will show the "UPLOAD CSV" button.
7. Verify Successful Upload
- Confirm that the student details have been successfully added by checking the student area. This area will update with the newly added students' information.
Important Notes
- Access Links: All newly added users will receive their access link in their mailbox once the above steps are completed.
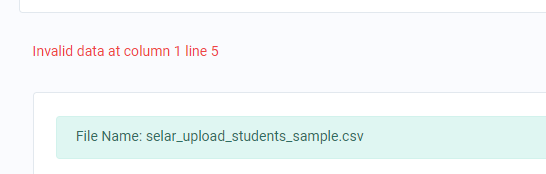
- Invalid Data Errors: If you encounter an invalid data error, you need to re-edit your CSV file on your computer and correct the errors before re-uploading.
Related Articles
How to access a Course bought on Selar
Congratulations on your course purchase through Selar! To ensure a smooth access process, we've outlined the steps for you to follow. Whether you're accessing the course for yourself or sharing it with someone else, this guide will help you navigate ...Course Certificate on Selar
Great news! Merchants can now issue certificates upon course completion. Here’s how to set it up: Access the Edit Product Page Go to the course you wish to edit and open the Edit Product page. Enable Certificate Option In the Options dropdown, check ...How to give a review on Selar
To leave a review, you must have purchased and used a product or service. If you have, this article is for you! When you buy a product on Selar, you receive a receipt link in the email address you provided during the purchase. This receipt includes a ...How can an affiliate access Selar's affiliate network
Follow these steps to become an affiliate and start earning commissions: Step 1: Login or Register 1. Log in to Your Selar Account Go to Selar Login and enter your credentials. 2. Register for a New Account If you don’t have an account, visit Selar ...How to hide the course curriculum on the product page of a course product
If you want to hide your course curriculum on the course product page, follow these steps: Go to Your Dashboard: Visit your Selar dashboard and click on "All Products" or go directly to this link. Select Your Course: Find the course you want to edit. ...